Thank-you Letters
Jump to navigation
Jump to search
Thank you letters are intended for those that have paid for their invoices. Select who should receive these letters by selecting the appropriate filter choices.
- Click Billing in the left-hand menu.
|
|
NOTE: You should review, and edit if necessary, the cover letter or email template you wish to use. For instructions on setting up your cover letters click. For instructions on working with your email templates click here. |
- Click the Reports tab.
- Click Thank you Letters in the Letters section of the Reports tab.
- Complete the filter as desired, making sure to select the desired Payment date range (or click more.. to pick a specific date range).
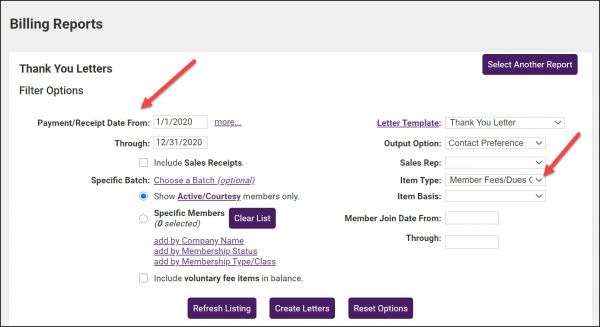
- FOR EXAMPLE: If you wish to view payments for a specific month and payments towards member dues:
- Enter the Date Range for the desired month.
- Select Membership Fees/Dues Only from the Item Type drop-down list.
- FOR EXAMPLE: If you wish to view payments for a specific month and payments towards member dues:
- Click Refresh Listing.
- Double-check the Output column to ensure the correct delivery method is selected for each member.
- Click Create Letters to use the existing, selected template. (or click Letter Template: to edit the current template)
- Select the desired Delivery method: Email or Print Letters.
- If selecting Email, double-check the Email From address and Subject Line and then click Send Emails. (or first click Preview Emails if desired)
- If selecting Print Letters, click Print Letters to view and print the letters.
- Note: Include return address should be selected if you desire that your association return address be placed at the top of the printed output.
- If needed, click Create Letters again and select Print Labels as the Delivery Method to print matching labels for the printed letters.

