Assign Transaction Classes to Transactions
Jump to navigation
Jump to search
Once Transaction Classes are created, a selection will appear automatically on transaction screens to assign to your invoices, sales receipts, credits, write-offs and invoice discounts.
1. |
Access the desired transaction screen for creating invoices, receipts, credits, write-offs, or invoice discounts. |
2. |
Select the desired transaction class that should be assigned to this transaction. |
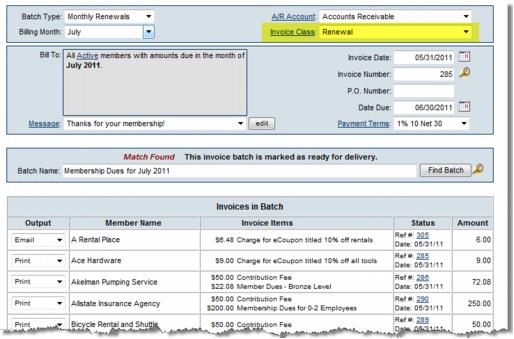
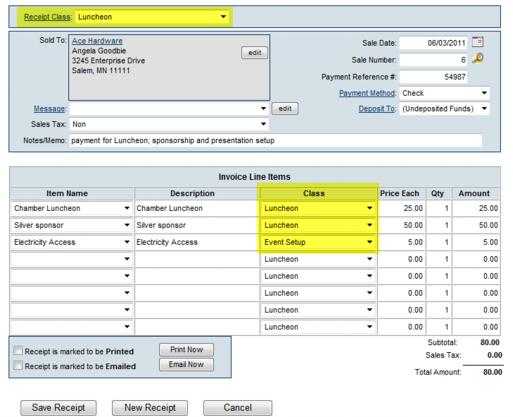
Note: For batch transactions, such as a Monthly Renewals and Event invoices batch, a single transaction class is assigned to all invoices in that batch. See Figure 1-17a below. When creating individual transactions, a unique transaction class may be assigned to each item. See Figure 1-17c below.
3. |
Save the transaction. |
4. |
The transaction class is now assigned to this transaction and is available to view on associated reports and will be included in the Journal Entry Export report. |

Figure 1-17b Sample Invoice batch with class assignment example

Figure: Sample individual event invoice with class assignment on individual items