Difference between revisions of "Managing Rep Permission Sets"
(Created page with "==Create a Permission Set== 1. Click Setup in the left-hand menu. 2. Click Manage Permission Sets in the Member Options area. 3. Click New Permission Set. 4. Type the name...") |
|||
| Line 58: | Line 58: | ||
5. Click the check box in front of the desired fields, making sure to include the Rep Permission Set field under the Rep Contact Information category. | 5. Click the check box in front of the desired fields, making sure to include the Rep Permission Set field under the Rep Contact Information category. | ||
| + | |||
| + | |||
| + | [[File:managerepperm.jpg]] | ||
| + | |||
6. Continue following standard instructions for creating a custom report. | 6. Continue following standard instructions for creating a custom report. | ||
7. The report will display the assigned permission set. | 7. The report will display the assigned permission set. | ||
Revision as of 02:51, 21 December 2015
Contents
Create a Permission Set
1. Click Setup in the left-hand menu.
2. Click Manage Permission Sets in the Member Options area.
3. Click New Permission Set.
4. Type the name of the new permission set in the Permission Set Name: field.
5. Select desired permissions. Note: If individual items are enabled, make sure to also select the checkbox for the heading of that section.
6. Click Save Permissions.
Note: The maximum permissions available here are controlled under Setup->Member Login Area Options and Settings.
Delete a Permission Set
When deleting a custom permission set, the rights assigned to a rep will be reverted back to their inherited permissions.
1. Click Setup in the left-hand menu.
2. Click Manage Permission Sets in the Member Options area.
3. Click the x at the end of the row of the desired permission set to be deleted.
4. Click OK to the warning message.
5. The permission set is now deleted.
Assign a Permission Set
1. Click Members in the left-hand menu.
2. Select the desired member and click the Reps tab.
3. Select the desired rep.
4. Scroll to the bottom of the screen and open the “Login Permissions for …” area.
5. Click View and Manage Permissions.
6. Click OK to acknowledge that changes made to a permission set will apply to all reps assigned to that set and not just this individual rep
7. Make desired changes to the set or create and assign a new set to this individual.
8. Click Save.
Reporting on Assigned Permission Sets
A list of the assigned permissions sets is available when running the custom rep report.
1. Click Reports in the left-hand menu.
2. Type “custom” in the Report Finder Search field. Click Search
3. Click the green arrow in the Reports window to the right of the Custom Representative Report.
4. Click the category where the desired field is located in the list of Available Fields.
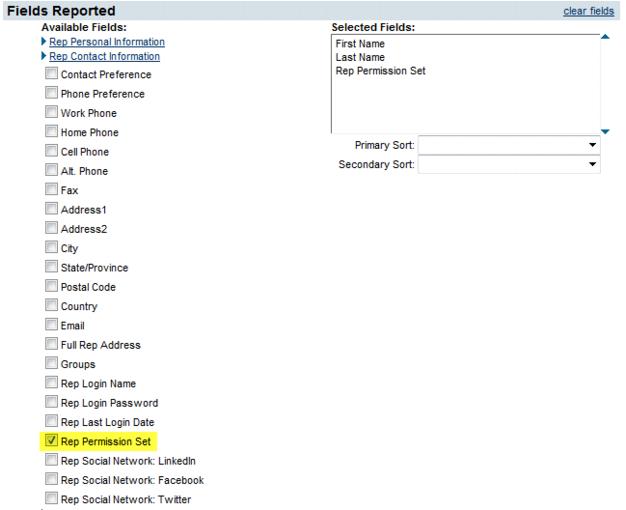
5. Click the check box in front of the desired fields, making sure to include the Rep Permission Set field under the Rep Contact Information category.
6. Continue following standard instructions for creating a custom report.
7. The report will display the assigned permission set.
