Upload and Place a Banner Ad
Information and settings related to banner advertising are modified on the Marketing tab. Changes made here are automatically reflected on your integrated web site.
Adding a Banner Ad
1. Within the Members module, select the desired member.
2. On the Marketing tab, click Add Banners.
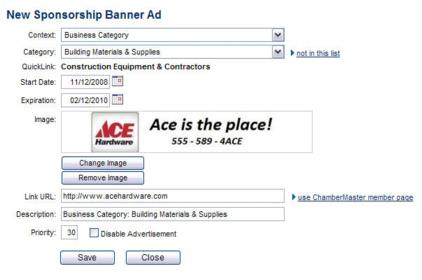
- Figure: Adding a Sponsorship Banner

3. Click the Context arrow and select the desired ChamberMaster page where the ad will post. If Business Category or QuickLink Category is selected as the Context, then select the appropriate Category.
- Note: You may also post ads on non-ChamberMaster/MemberZone pages by having your web designer add specific banner ad code to the webpage.
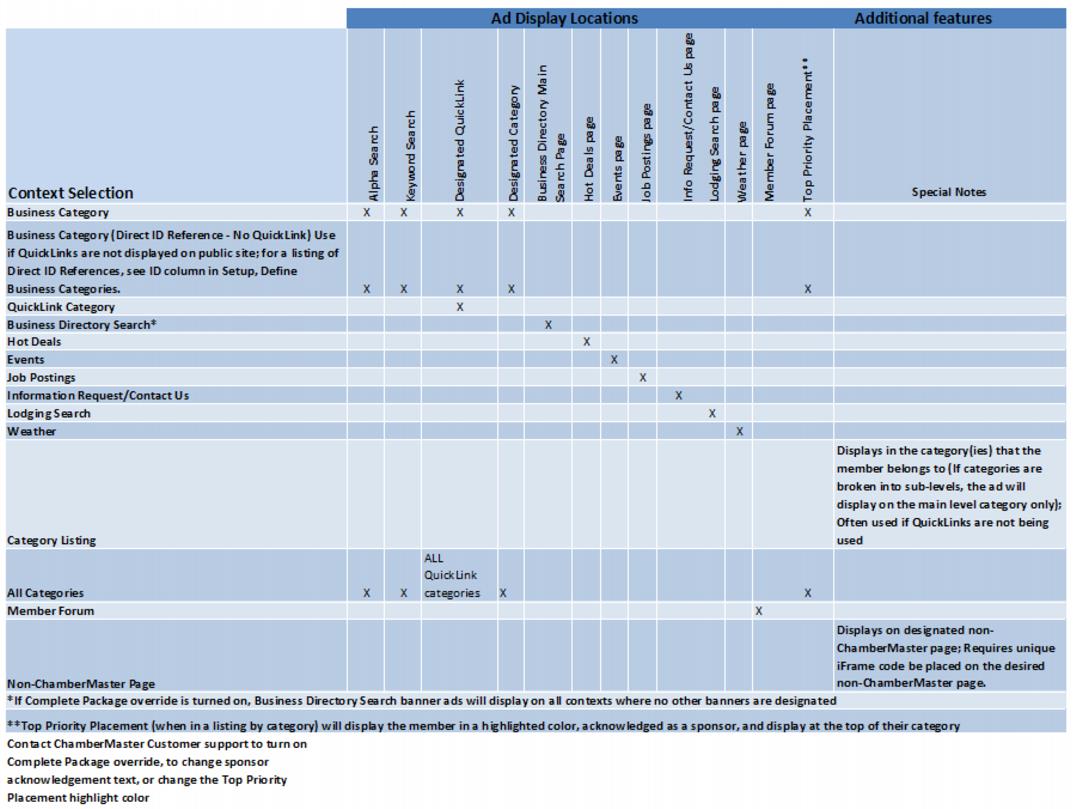
- Figure: Context Selection options

4. Type a Start Date and Expiration Date.
- a. Click Add Image to upload the banner ad. Type the path and filename of the desired graphic file or click Browse to locate and click Open when desired graphic is located.
- b. Click Upload Image.
5. Click Close Window.
6. Enter the member's website in the Link URL field. This is the URL that the banner ad will link to if clicked. If the member does not have a website, you may select to link to their chamber member page instead.
7. Enter a Description.
8. By entering the Priority of 10, the member will be selected randomly among all members displaying banners in this category.
9. Click Save.