Difference between revisions of "News Releases"
Jump to navigation
Jump to search
Cpetterson (talk | contribs) |
Cpetterson (talk | contribs) |
||
| Line 56: | Line 56: | ||
:: | :: | ||
| − | == | + | ==='''<span style="color:#800080">Create a News Release from the Back Office'''</span>=== |
| − | + | ---- | |
| − | + | #Click '''News Releases''' in the left-hand navigation panel. | |
| − | + | #:[[File:BO Add NR 2020.jpg|600px|center]] | |
| − | + | #On the '''Home''' tab, click the '''Add a News Release''' button. | |
| − | + | #:[[File:BO Create NR 2020.jpg|600px|center]] | |
| − | + | #Enter the following information: | |
| − | + | #:'''Title''': Enter a title for the news release. | |
| − | + | #:'''Start/End Date''': Enter the dates that you wish this news release to be displayed. | |
| − | + | #Click '''Continue'''. | |
| − | + | #*[[File:NR Details BO 2020.jpg|600px|center]] | |
| − | + | #(Optional) To associate this news release to a specific member, click the '''choose a member''' link and select the member | |
| − | + | #Configure the following information for the news release: | |
| − | + | #* | |
| − | |||
| − | |||
| − | |||
| − | |||
| − | |||
| − | |||
| − | |||
| − | |||
| − | |||
| − | |||
| − | |||
| − | |||
| − | |||
| − | |||
Revision as of 13:39, 24 March 2020
Contents
Overview
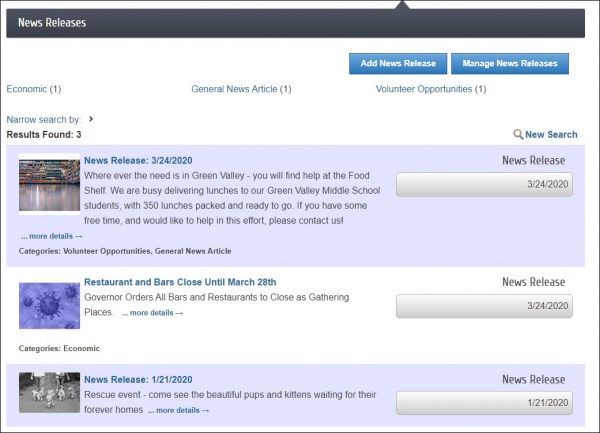
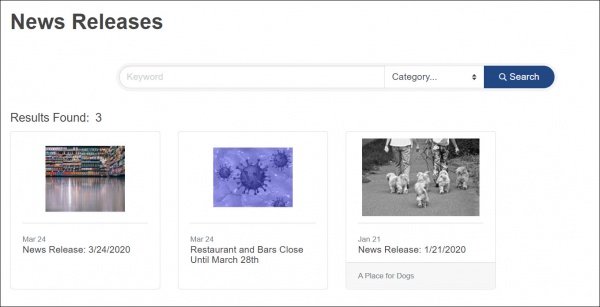
The News Release feature is a great way to publish press releases, event summaries, and business news to your website and/or Member Information Center. Your members can submit a News Release for your approval through the Member Information Center, or you can create a News Release on their behalf from your Dashboard. Once you set a News Release to "Approved", it will be live in the News Releases section of the MIC

And on your public webs-site, if you have integrated this public module.

Submit a News Release from the MIC
|
|
IMPORTANT: The rep must have Read/Write access to News Releases to be able to add them in the MIC. |
- In the MIC, select News Releases in the left hand panel.
- Select News Releases from the left side menu.
- Click Add News Release.
- Complete the following information:
- Title: Enter a title for the news release.
- Displayed Release Date: This date is displayed on the news release page to let people know the "age" of the release.
- Publish Start/End Date: Indicate when you would like to first publish this news release, and when it should no longer be published.
- Body Text:: Enter in the actual news release.
- Meta Description: Enter a 1-2 sentence summary of your content; often visible in search engine results and social media posts/shares; 320 characters max.
- Categories: Select the category(ies) under which this news release should be.
- Search Results Logo: Select the image that you wish to display in News Release search results.
- Contact Information: Enter desired contact information.
- Click Submit for Approval.


|
|
See Adding a News Release from the MIC in Action! |
Instructions for Staff: Approving a News Release
- Login to your Dashboard.
- Below the left-hand menu, click the Task List item titled News Releases. The pending News Release items will be shown.
- Click the title of the News Release so that you can make any changes needed (such as editing the content, setting publish start and end date, assigning a category).
- When ready, change the status from Pending to Approved and click Save. Once the status is Approved, then the release will show on your site beginning on the Publish Start Date.

- Figure: The Task List
Create a News Release from the Back Office
- Click News Releases in the left-hand navigation panel.
- On the Home tab, click the Add a News Release button.
- Enter the following information:
- Title: Enter a title for the news release.
- Start/End Date: Enter the dates that you wish this news release to be displayed.
- Click Continue.
- (Optional) To associate this news release to a specific member, click the choose a member link and select the member
- Configure the following information for the news release:


