Difference between revisions of "ECommerce-Create a product with a single product variant"
Jump to navigation
Jump to search


(Created page with "<div xmlns="http://www.w3.org/1999/xhtml"> <div style="text-align: left;">Table of Contents | Previous |...") |
|||
| Line 1: | Line 1: | ||
<div xmlns="http://www.w3.org/1999/xhtml"> | <div xmlns="http://www.w3.org/1999/xhtml"> | ||
| − | |||
| − | |||
| − | |||
| − | |||
| − | |||
<div style="font-family: "Times New Roman"; font-size: 11pt; margin-bottom: 12pt; margin-left: 18pt;"><span id="wwpID0E0MI0FA">[[http://www.screencast.com/t/jdSlaopA|[[Image:eCommerce-Create_a_product_with_a_single_product_variant-eCommerce.1.22.01.jpg]]]]</span> <span style="color: #003366; text-decoration: underline;">[[http://www.screencast.com/t/jdSlaopA|Creating a product]]</span> 1:55 – the basics</div> | <div style="font-family: "Times New Roman"; font-size: 11pt; margin-bottom: 12pt; margin-left: 18pt;"><span id="wwpID0E0MI0FA">[[http://www.screencast.com/t/jdSlaopA|[[Image:eCommerce-Create_a_product_with_a_single_product_variant-eCommerce.1.22.01.jpg]]]]</span> <span style="color: #003366; text-decoration: underline;">[[http://www.screencast.com/t/jdSlaopA|Creating a product]]</span> 1:55 – the basics</div> | ||
<div style="font-family: "Times New Roman"; font-size: 11pt; margin-bottom: 12pt; margin-left: 18pt;"><span id="wwpID0E0LI0FA"> </span></div> | <div style="font-family: "Times New Roman"; font-size: 11pt; margin-bottom: 12pt; margin-left: 18pt;"><span id="wwpID0E0LI0FA"> </span></div> | ||
Revision as of 15:36, 24 March 2016
[ ] [a product] 1:55 – the basics
[ ] [a product] – more details
Most products are created with a single product variant, which are the steps shown here. See ‘Understanding products’ for more information.
1. |
Click eCommerce in the left-hand menu. |
2. |
Click Catalog drop-down menu. |
3. |
Select Manage Products from the Products menu. |

4. |
Click Add new. |
5. |
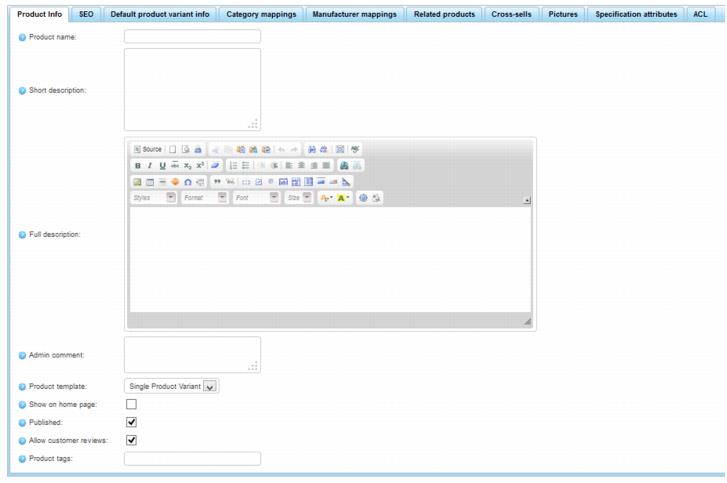
Complete the Product Info information. |

6. |
Click Save and Continue Edit. |
7. |
Click the Category mappings tab. |
8. |
Click Add new record. |

9. |
Select the desired category from the Category drop-down list. |
10. |
Click Insert. |
11. |
Click Save and Continue Edit. |
12. |
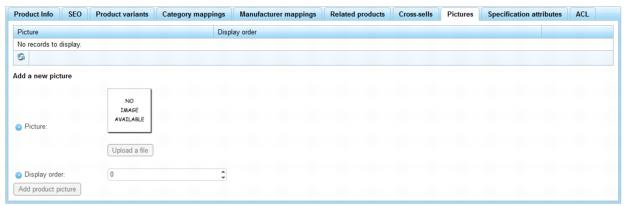
Click the Pictures tab. |

13. |
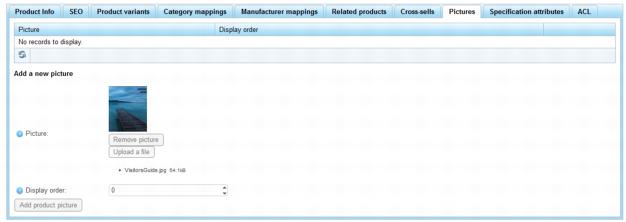
Click Upload a file and locate a picture that should display for this item. |

14. |
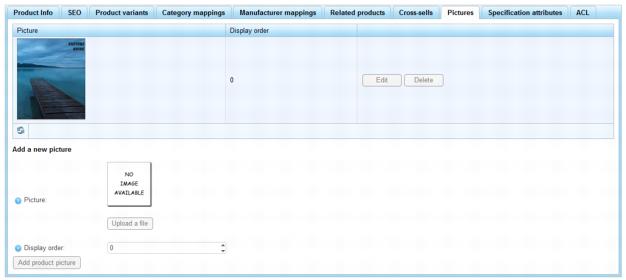
Click Add product picture. |

15. |
Click the Product variants tab. |

16. |
Click Edit in the row of your newly created variant. |
17. |
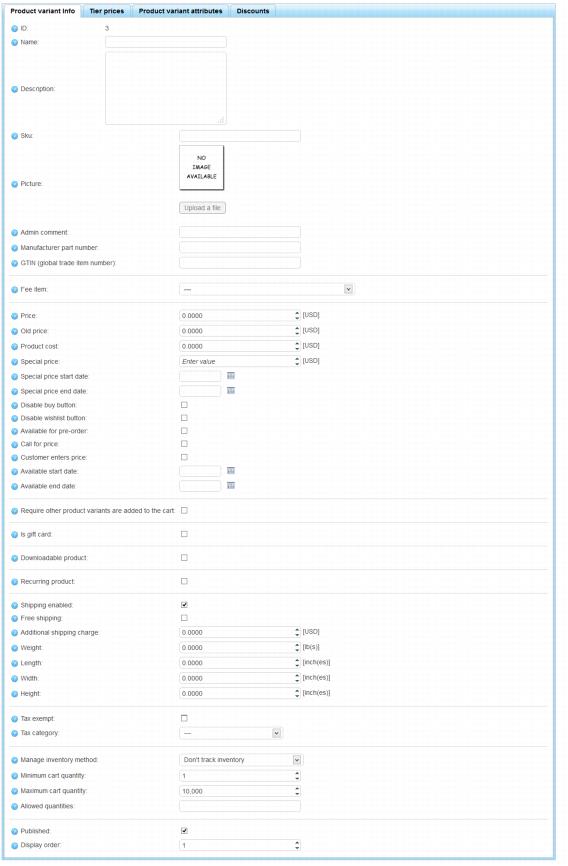
Complete the Product variant info screen where the price and other details are specified. Especially note these fields: |
Fee item: Make sure to select a Fee item so that this item will be included on invoices or receipts created in your billing transactions. |
Price: Enter a price that will display for the public. |
Shipping Enabled: Check this box if shipping should be applied to this item. |
Weight: Enter the weight of the item if using “Shipping by Weight’ method. |
Length, Width, Height: Enter these items if using shipping by carriers such as UPS, USPS, or Fedex. |
Tax exempt: Check if this item should not be taxed. If checking ‘Tax exempt’, a Tax category cannot be assigned. |
Tax category: If taxable, select the tax category that should be assigned to this item. If no tax category is assigned, no tax will be charged. Note: Every tax method requires that a tax category be assigned to the item. |

18. |
Click Save. |