Difference between revisions of "MIC Resources"
Jump to navigation
Jump to search
| Line 14: | Line 14: | ||
#Login to your software. | #Login to your software. | ||
#Click the MIC button in the upper right-hand tool bar. | #Click the MIC button in the upper right-hand tool bar. | ||
| − | #:''Note: The MIC button will appear only if you have enabled Member Information Center v4 for your members. | + | #:[[File:micbutton.jpg]] |
| − | #Click Resources in the top tool bar. | + | #:'''Note: '''The MIC button will appear only if you have enabled Member Information Center v4 for your members. |
| − | #Click Add Resource. | + | #Click '''Resources''' in the top tool bar. |
| − | #Select the desired Resource Type. | + | #Click '''Add Resource'''. |
| − | #*Document: Examples include Word, Excel, PDF, image files | + | #:[[File:add_resource1.jpg]] |
| − | #*Video: Accepts most video file formats | + | #Select the desired '''Resource Type'''. |
| − | #*Website: Allows you to specify a website URL | + | #:[[File:add_resource2.jpg]] |
| − | #Select the desired Upload method. (Depending on which Resource Type selected, the upload options will vary.) | + | #*'''Document''': Examples include Word, Excel, PDF, image files |
| − | #Input information required for the Upload method selected. | + | #*'''Video''': Accepts most video file formats |
| − | #Complete the Title and Summary (optional) that will display for members. | + | #*'''Website''': Allows you to specify a website URL |
| − | #Select a Category (although optional is it recommended). | + | #Select the desired '''Upload''' method. (Depending on which Resource Type selected, the upload options will vary.) |
| + | #:[[File:add_resource3.jpg]] | ||
| + | #Input information required for the '''Upload''' method selected. | ||
| + | #Complete the '''Title''' and '''Summary''' (optional) that will display for members. | ||
| + | #Select a '''Category''' (although optional is it recommended). | ||
#(Optional) Select a group or groups that this resource should be limited to. | #(Optional) Select a group or groups that this resource should be limited to. | ||
| − | #Click Save Resource. | + | #Click '''Save Resource'''. |
Revision as of 13:25, 27 April 2016
Post resources (video, website, or document) for all or selected groups
Office staff may load documents, photos, videos, website URLs for all members or for selected groups.
![]() Watch video describing how to upload and use resources
Watch video describing how to upload and use resources

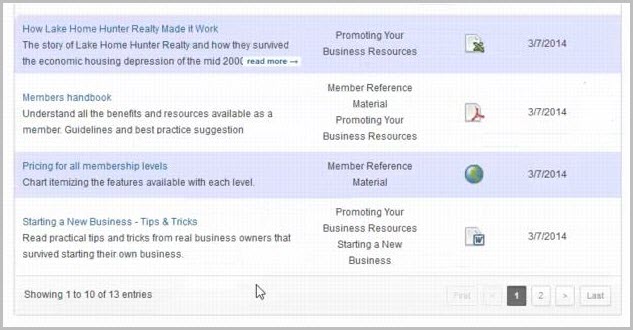
Example of Resources that could be available to your members
Note: Files uploaded under the back office menu Cloud Drive under Shared Documents in the Member_Only Files can be loaded into the MIC v4 Resources section but will not automatically populate; they must be added individually by following the steps below and selecting Cloud Drive as the Upload Option.
Add files to MIC4 Resources
- Login to your software.
- Click the MIC button in the upper right-hand tool bar.
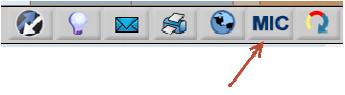
- Note: The MIC button will appear only if you have enabled Member Information Center v4 for your members.
- Click Resources in the top tool bar.
- Click Add Resource.
- Select the desired Resource Type.
- Document: Examples include Word, Excel, PDF, image files
- Video: Accepts most video file formats
- Website: Allows you to specify a website URL
- Select the desired Upload method. (Depending on which Resource Type selected, the upload options will vary.)
- Input information required for the Upload method selected.
- Complete the Title and Summary (optional) that will display for members.
- Select a Category (although optional is it recommended).
- (Optional) Select a group or groups that this resource should be limited to.
- Click Save Resource.


