Difference between revisions of "Using Predefined Communication Templates"
Jump to navigation
Jump to search
| Line 4: | Line 4: | ||
1. In the email edit screen, click '''Choose a Template'''. | 1. In the email edit screen, click '''Choose a Template'''. | ||
| + | |||
| + | |||
| + | ::[[File:edit_email_screen.png]] | ||
| + | |||
| + | ::'''Figure: '''The email edit screen. | ||
| + | |||
2. Click '''Predefined Templates'''. | 2. Click '''Predefined Templates'''. | ||
Revision as of 19:05, 24 February 2016
A number of predefined templates are provided that may be selected and brought onto your own list of templates. You may use these templates “as is” or choose to modify and then re-save with your own name.
Adding a Predefined Template
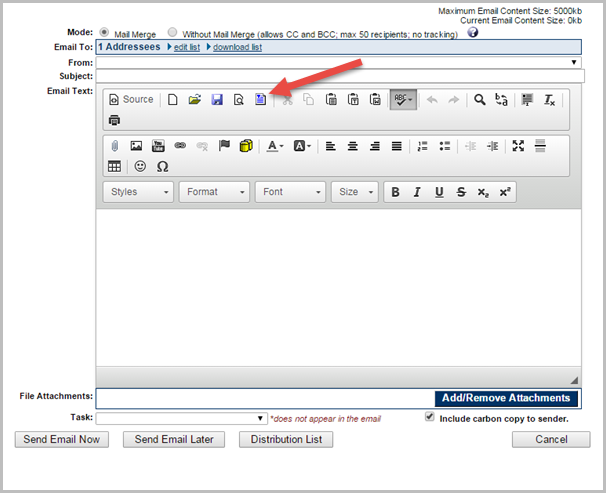
1. In the email edit screen, click Choose a Template.
- Figure: The email edit screen.
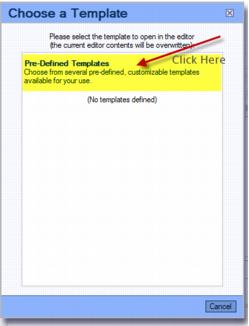
2. Click Predefined Templates.
- Figure: Selecting Predefined Templates
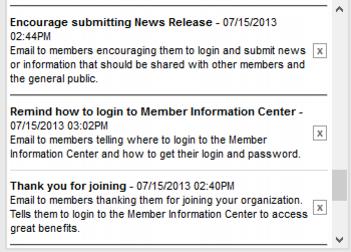
3. Click the template title to select the desired predefined template.
- Figure: Sample of predefined templates
4. Click OK to select another template right now or click Cancel to return to your own list of templates.
5. Once on your list of templates, click to select the desired template.
6. All fields with [ ] will auto-fill with the data from the member’s record or from your association contact information where appropriate.


