ECommerce-Create product with multiple attributes
Jump to navigation
Jump to search


Most products are created with a single product variant. But some products may be best suited for a single variant but multiple product variant attributes, as is the case with a shirt that comes in different colors and sizes. Steps shown below will assist in creating that scenario. See ‘Understanding products’ for more information on all options for creating products.
1. |
Follow the steps for creating a product with a single variant. |
1. |
After creating the initial variant, you will assign select the colors and sizes that are available to this product. To do this, click the Product variants tab when editing the product. The variant will be listed. |
2. |
Click Edit in the row of the variant. |

3. |
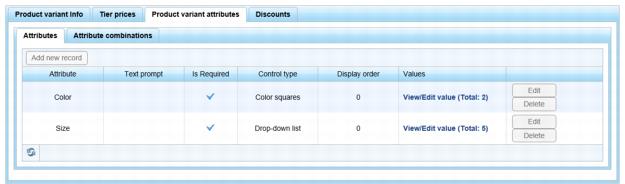
Click the Product variant attributes tab. |
4. |
Click Add new record. |
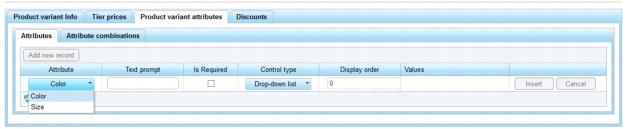
5. |
Click the Attribute drop-down box to select your attribute that you created under Catalog->Attributes->Product Attributes. (e.g. Size) |

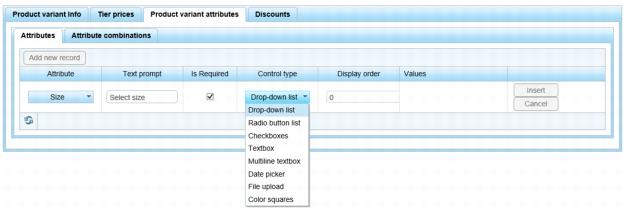
6. |
Complete the fields including an optional Text prompt, whether the field is required, and then selecting the type of Control needed. |
With the variety of options here, you can collect customer information in multiple ways. The Drop-down list or Radio button list is great for collecting sizes. The Textbox is useful if you have to ask for custom wording; the Date picker is helpful if asking for a data preference; and the Color squares are perfect for displaying a specific color selection because you pick the display color using a Hex value color wheel. Pick the Control most appropriate for your input needs. File upload is appropriate if asking for a graphic or other document.

7. |
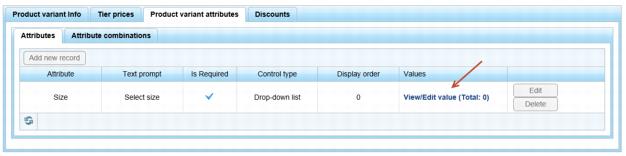
Click Insert. |
8. |
Click View/Edit value to enter the values that will display for your customers. |

9. |
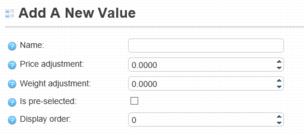
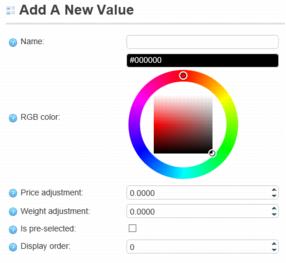
Click Add a new value. |

10. |
The screen that displays next will depend on which control you selected. |
Textbox, Multiline textbox, Date picker, and File upload do not have any additional configuration options. |
Drop-down list, Radio button list, Checkboxes |

Color squares |

11. |
Continue until all attributes have been entered. |

12. |
In cases where there are a combination of attributes that make up a single item, such as a shirt that is red (attribute 1) and is size medium (attribute 2), you will want to create appropriate Attribute combinations that represent each combination. This will allow you to specify specific inventory quantities for these and would report “Out of stock” when a selection is attempted for an item listed as 0 quantity. |
13. |
To create attribute combinations, click the Attribute Combinations tab. |
14. |
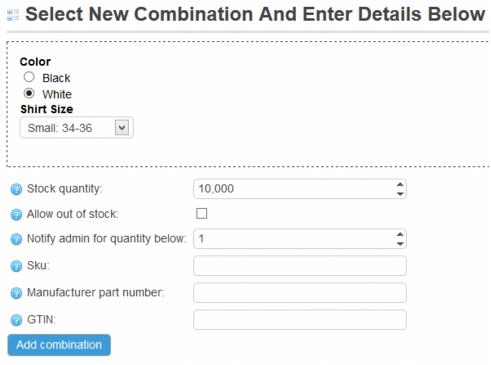
Click Add combination. |
15. |
Complete the fields that represent one particular combination. (e.g. Color White; Size Small) |

Sample is shown above with an Attribute of Color and Size. |
SKU number is created by you – whatever number you would like. |
Make sure the Stock quantity is correct. |
If you wish for the customer to receive an “out of stock” message when inventory is at 0, then leave the checkmark un-checked. Checking the box will allow the customer to place the order anyway. |
Notify Admin for quantity below: When your stock goes below the designated number, an automatic email is sent to the Store owner. Find this email template under Content Management->Message Templates and make sure it is active. The Message Template is titled, “QuantityBelowCombination.StoreOwnerNotification” |
16. |
Click Add combination. |
17. |
Continue adding combinations until all combinations are represented. |
Note: If a combination is not represented here but can be selected by the shopper, they will be able to order the item and it will not be reflected in your inventory quantity.
18. |
If using Inventory tracking, change the inventory method for this product variant so that it will track by the attributes. Select Product Variant Info tab on this variant. |
19. |
Scroll down towards the bottom and select Track inventory by product attributes from the Manage inventory method drop-down list. |

20. |
Click Save. |
The Low Stock Report under Catalog->Products will display the items and their inventory levels.