Create a group or mailing list
Jump to navigation
Jump to search
Redirect to:
__Groups__
- Click Groups in the left-hand menu.
- Click Create a Group on the Home tab.
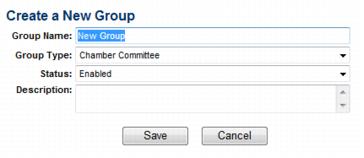
- Complete the Create a New Group fields for this new group.
- Click Save.
- Click the Group Name of the new group on the Home tab.
- Click the General tab. Make sure the settings are correct.
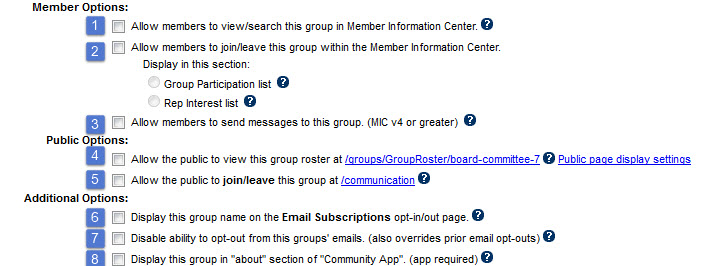
- When selected, this roster list will be shown as a group/interest that may be searched by members in the Member Information Center.
- When selected, members will have opportunity to join/leave this group/interest on their own in the Member Information Center. The selection of Group Participant list or Rep Interest list determines where the selection will take place – under Groups or under Interests. Interests.
- This option allows the group to be contacted through the Member Information Center Message Center
- When selected, this group will display on your website in the Groups public module available at http://yoursubdomain.yourdomain.com/groups.
- Click Public Display Settings to modify how the group is displayed
- When selected, this group will appear on your public website at the suggested URL where the public may add themselves to the group. Often used for consumers to subscribe to (join) your mailing lists.
- When selected, this group name will be displayed on the email subscription opt-in/out page
- When selected, this group cannot be unsubscribed from
- When selected, this group will be accessible through the community app (when purchased)
- Click the Roster tab.
- Click one or more of the Add Group Members selections to add members to your group.
- Continue adding representatives to your group using the Add Group Members selections until your group is complete.


