Modify the Directory Control Panel
Jump to navigation
Jump to search
Contents
Making Changes
- Click Setup in the left-hand menu
- Click Directory Control Panel
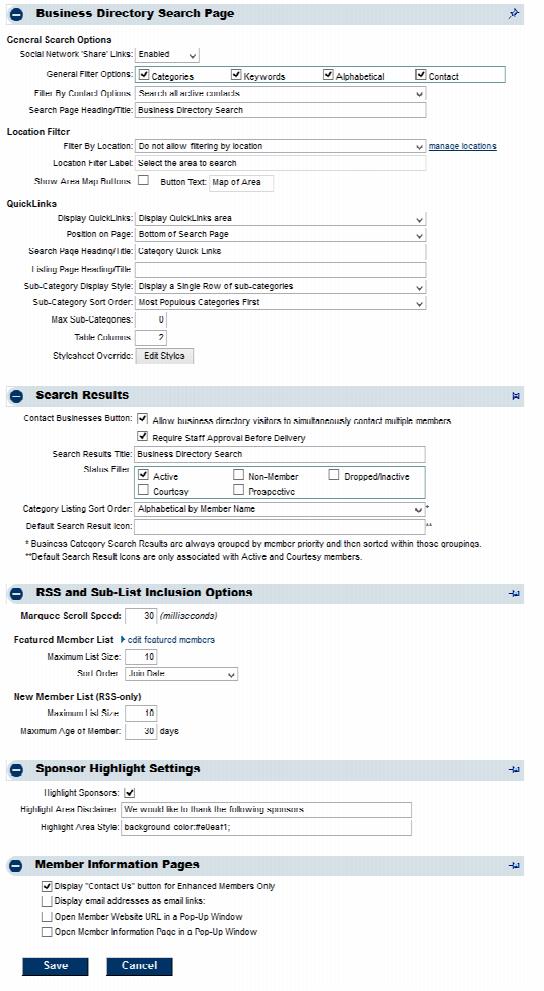
- Make the desired changes
- Click Save
Description of Commonly Modified Selections
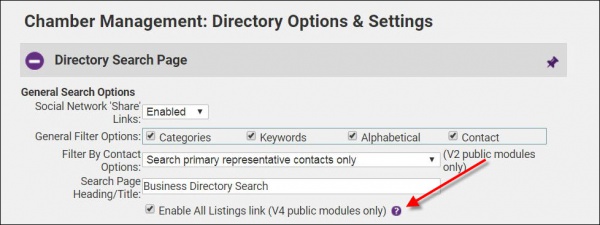
Enable All Listings link
If you are using version 4 public modules for your public member directory listing, then a search option of "All" will appear on your directory search page that will allow the visitor to easily view all of your public listings in a single result. If this is not selected, listings can only be viewed using search criteria.
- Click Setup in the left-hand menu
- Click Directory Control Panel.
- Tick the Enable All Listings link (V4 public modules only) check-box in the Directory Search Page section.
- Click Save.
- When this selection is enabled, website visitors will see links to share the listing/posting on FaceBook, Twitter, LinkedIn or email to a friend. Share links will appear on the member’s website Information Page, Hot Deals, Member-to-Member deals, job postings, MarketSpace items, and on event description pages. Note: This selection is only available when your website has been integrated with the SEO module integration.
Filter by Contact Options
- Select whether individual representative names should be used as search criteria in the online Directory search. See options below in Figure 2. If this selection is enabled, then the General Filter Options: Contact will also be selected. Note: This selection is only available when your website has been integrated with the SEO module integration.
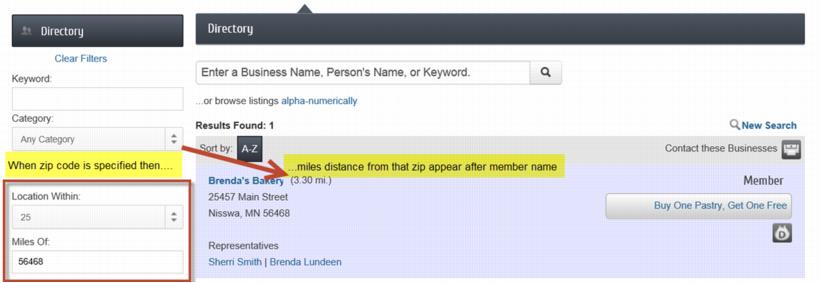
Filter by Location (Filter by Geographic Proximity)
- When the Directory is searched by zip code proximity, member names will now display a distance from that zip code after their member name. Note: Miles will show for all US associations and kilometers will display for all others
Contact Businesses Button
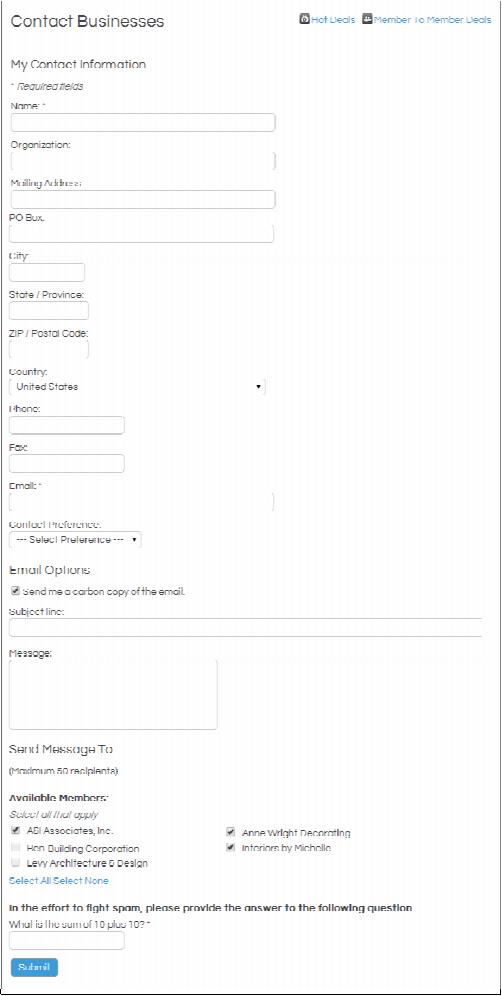
- When this checkbox is selected, website visitors will have an option to Contact these Businesses when viewing a list of members in the online Directory, whether searching alphabetically, by category, keyword or any other way. This single message is sent via email to the selected businesses. Each request is tracked in the database as an eReferral, just like any eReferral form completed by your internal staff. Use with Require Staff Approval Before Delivery checkbox if you’d like to approve the message before it is sent.
Require Staff Approval Before Delivery
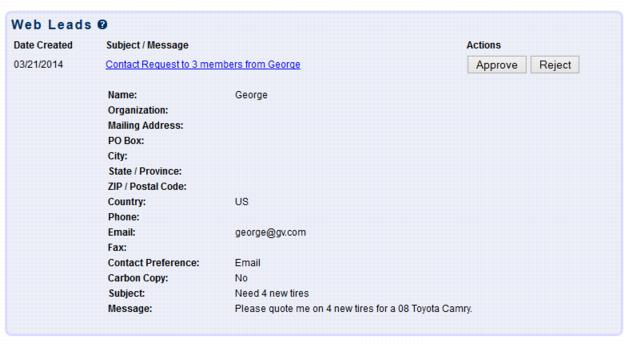
- Select this checkbox if you’d like to approve the Contact These Businesses message before it is delivered to the member. When a lead is received it will appear in the Web Leads Task List.
- How to Approve or Reject a Web Lead
- 1. Click Web Leads in the Task List
- 2. If a message is awaiting approval, click the Subject/Message.
- 3. View the content of the message.
- 4. If this message should be delivered to members, click Approve. The message will be sent immediately.
- 5. If this message should not be delivered to members, click Reject. The message will not be sent to members. No notice is sent to the sender of your rejection.
- 6. The recipients of sent messages may be viewed on the Communication➝Member Contact Report.
- Hint: Make sure to select “Bulk Mail” and to clear the Staff Contact field and then click Refresh.
