Difference between revisions of "Send Email Invitations for an Event"
Jump to navigation
Jump to search
| Line 3: | Line 3: | ||
<tr valign="baseline"> | <tr valign="baseline"> | ||
<td style="width: 18pt"><div style="font-family: Calibri; font-size: 11pt;">1. </div></td> | <td style="width: 18pt"><div style="font-family: Calibri; font-size: 11pt;">1. </div></td> | ||
| − | <td><div style="font-family: Calibri; font-size: 11pt;"><span id="wwpID0E0KO0HA">On the Guest List tab, click | + | <td><div style="font-family: Calibri; font-size: 11pt;"><span id="wwpID0E0KO0HA">On the Guest List tab, click Create Invitations in the Guest List Summary area.</span></div></td> |
</tr> | </tr> | ||
</table> | </table> | ||
Revision as of 17:15, 11 October 2016
1. |
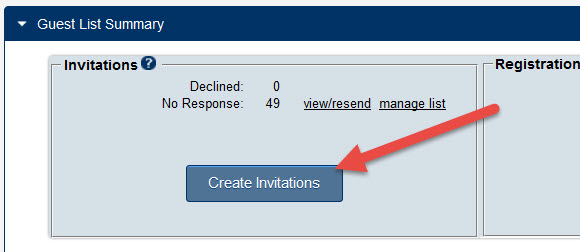
On the Guest List tab, click Create Invitations in the Guest List Summary area. |
Figure 5-1 Add New Invitations
2. |
Select the attendees that should receive invitations using one or more selections available under Add Invitees, Add Members, or Add Representatives. Repeat until your invitee list is complete. |
Figure 5-2 Add invitees to list
3. |
Click Send Invitations. |
4. |
Complete the Send an Email invitation screen. |
Using the Add Database Field  icon, you may wish to personalize the invitations by inserting their name.
Invitees that already appear on the Guest List will automatically be marked with an asterisk and may be removed by clicking Remove to avoid accidental duplication of these invitees on the participant list.
Saving the email invitation using the save  icon is recommended so that you can resend these invitations at a later date if desired.
5. |
Click Send Email. |
If any invitees do not have an email address, they will be added to the Guest List with a Status column displaying “No Invite Sent”. Follow the steps in the section below titled “To create mailing labels for those with ‘No Invite Sent’ status” to create mailing labels for these invitees.
