Create a Single Login Account
The following procedure will create a single login account for a member representative.
1. In the Members module, select the desired member from the Members drop-down list at the top of the screen.
2. Click the Reps tab.
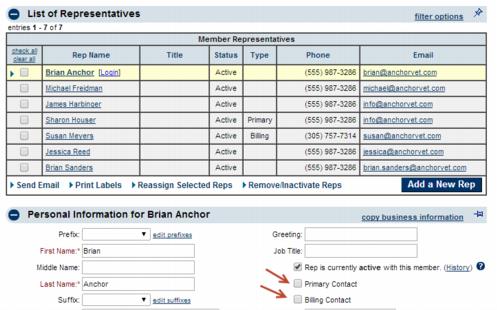
3. Click the name of the desired rep so that they are highlighted.
4. Make sure the proper role is assigned to them under the Personal Information area: "Primary", "Billing" or neither of these which would indicate a "Standard" role).
Note: The role selection will determine the permissions given to this rep in the Member Information Center. You can choose another permission set for this rep, but initially the permissions granted will default to one of three default sets: Primary, Billing, or Standard. You may modify the details of each of the sets or create your own if needed.
Figure: "Primary" and "Billing" role checkboxes. In this example, Brian Anchor’s role is set at “Standard” (the lack of either checkbox)
5. Scroll to the bottom and open the "Login Permissions" area.
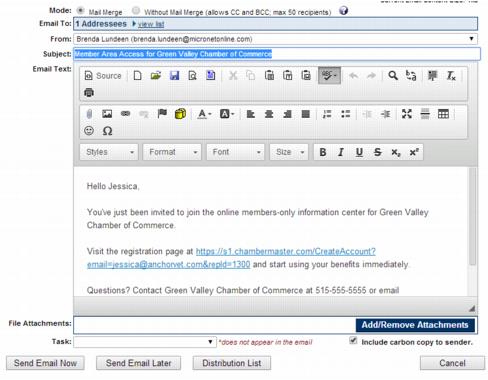
6. Best Practice Method: If no login has been assigned yet, click "send them an invitation".
Note: This will open the email editor with a personalized invitation ready to be sent. Make desired changes such as a different subject line if desired or additional wording. No changes are necessary though - only if you desire. The personalized link in the email is what will allow them to create their login with appropriate permissions.
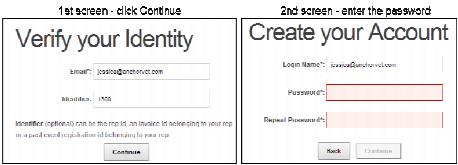
6. Alternate Method: If no login has been assigned yet, click "Create their login right now".
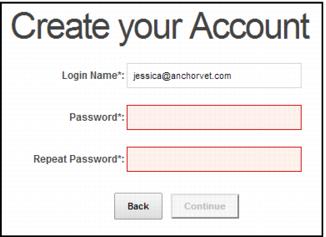
Note: This alternate step will bring you to a screen that is auto-populated with the identifying information for the rep. Click "Continue" and enter the desired password on the second screen. This option is appropriate if you are conversing with the rep at that moment and want to provide them with immediate access. Tell them the temporary password you’ve created for them but remind them to login and change it to something they will remember once they get logged in.
7. Click Send Email Now.
When the email is received and the personalized link is selected, the rep will be brought to a screen where they may create their own login and password. Their email address will be suggested as the Login Name. Or if not available, then another suggestion will be provided. They will be allowed immediate access to the Member Information Center.


