Enable and Customize Promote Your Business Widget
Jump to navigation
Jump to search

The Promote Your Business widget will display in Member Information Center (MIC) for those that have a Basic Web Participation package to encourage Basic package members to upgrade to an Enhanced Web Participation package. You can enable/disable the widget and control the message that appears with the widget.
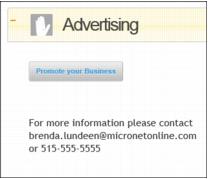
Promote Your Business widget appears at the bottom of the Dashboard:

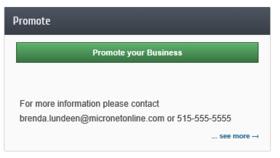
Promote Your Business and Upgrade your Listing widgets appear on the Company Information->Profile Summary page.

The Upgrade your Listing widget may also appear and be controlled by this setting depending your benefit campaign. Contact [Main_Page|customer support]] for details.

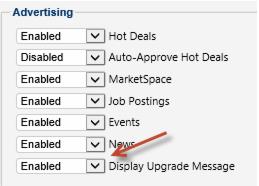
Enable/Disable the Promote your Business and the Upgrade your Listing widget
1. |
Click Setup in the left-hand menu. |
2. |
Click Member Login Area Options & Settings in the General Information area. |
3. |
Click the Permissions tab. |
4. |
Click the Enabled/Disabled selection in the Display Upgrade Message drop down. |

5. |
Click Save. |
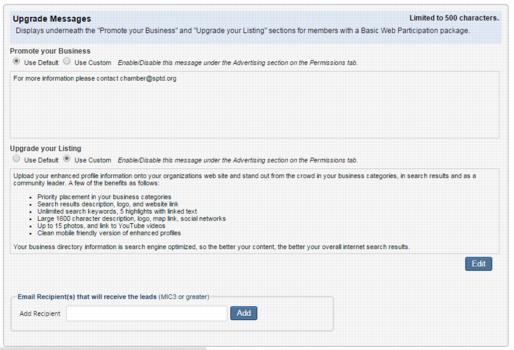
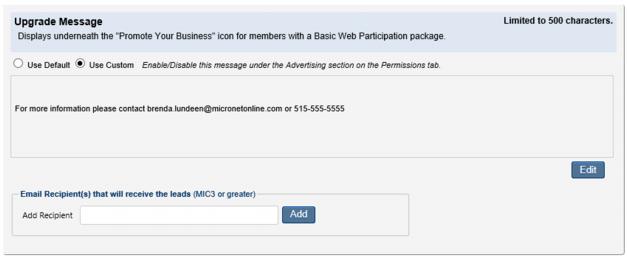
Edit the message on Promote your Business and the Upgrade your Listing widget
1. |
Click Setup in the left-hand menu. |
2. |
Click Member Login Area Options & Settings in the General Information area. |
3. |
Click the Messages tab. |

4. |
Click Use Custom. |
5. |
Click Edit. |
6. |
Make desired changes to the text. |
7. |
Click Continue. |
8. |
Click Save. |
Note: you can return to the default text at any time by clicking Use Default and then click Save.
Determine the email recipients of Promote your Business and the Upgrade your Listing widget
1. |
Click Setup in the left-hand menu. |
2. |
Click Member Login Area Options & Settings in the General Information area. |
3. |
Click the Messages tab. |

4. |
Type the email addresses of the desired recipients of those that submit a request to "promote their business.” |
5. |
Click Save. |
Note: you can enter multiple email addresses. Separate them by a ; (semi-colon)