Managing Refunds
Contents
Manage Refunds
The process for creating a refund will vary, dependent on the processor used, and on whether the payment was received against an invoice or a receipt.
Create a Refund for Invoice Transactions
Create a Refund for a Cash/Check/BeanStream/PayPal/External Processor Payment Made towards an Invoice
If the payment received was cash/check, AND the payment was made towards an open invoice, use the following procedure:
- Click the link of the payment you wish to refund.
- Click the Refund Payment button.
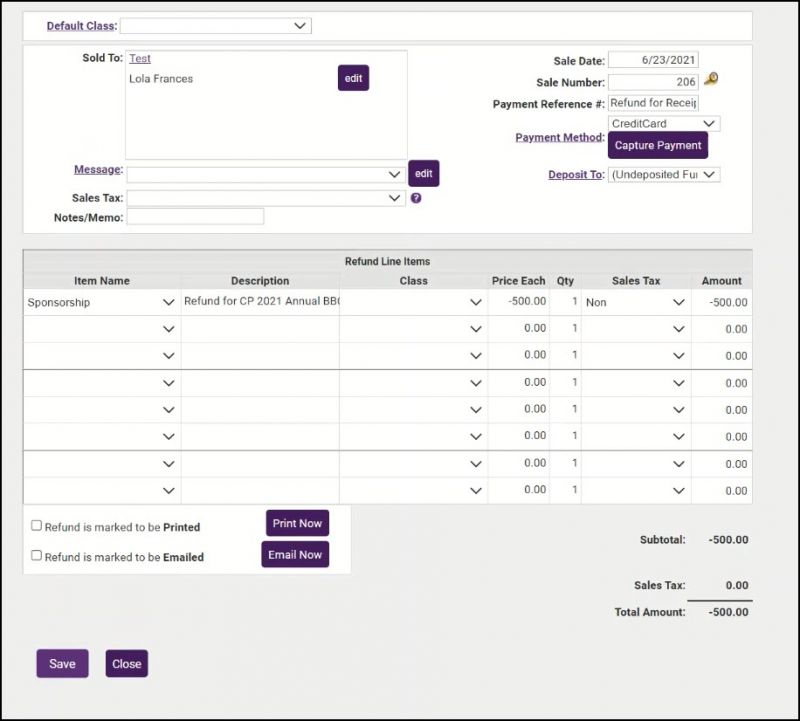
- The refund will automatically be set to the full amount of the payment. You may issue a partial refund, by entering in the amount you wish to refund in the Price Each column. NOTE: Be sure to include the minus sign in front of the amount.
- Click Save.
- Click Close.
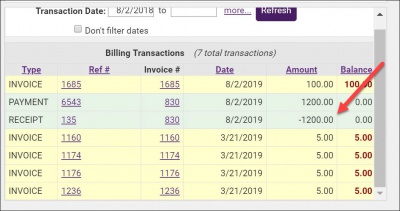
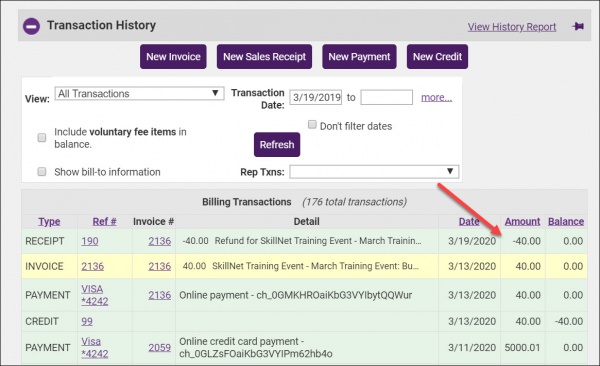
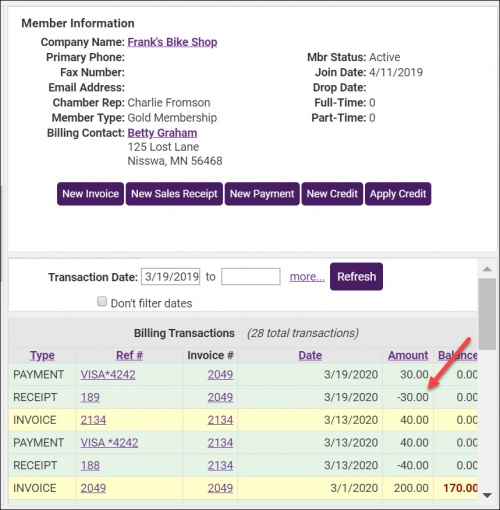
The refund will be displayed as a negative sales receipt in the list of transactions. You will now need to follow your business process for actually giving the money back to the contact.
Create a Refund for a GrowthZone Pay Payment Made towards an Invoice
IMPORTANT: When creating GrowthZone Pay refunds the following rules apply:
|
Creating a GrowthZone Pay refund is a two step process: first you will refund the charge through the processor, then you will create the matching accounting transaction. Both steps are achieved as follows:
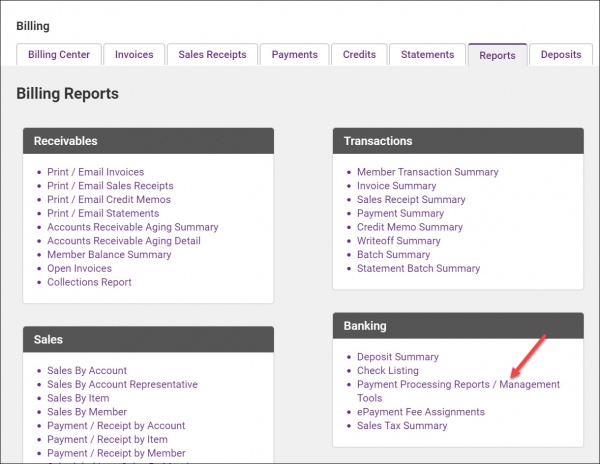
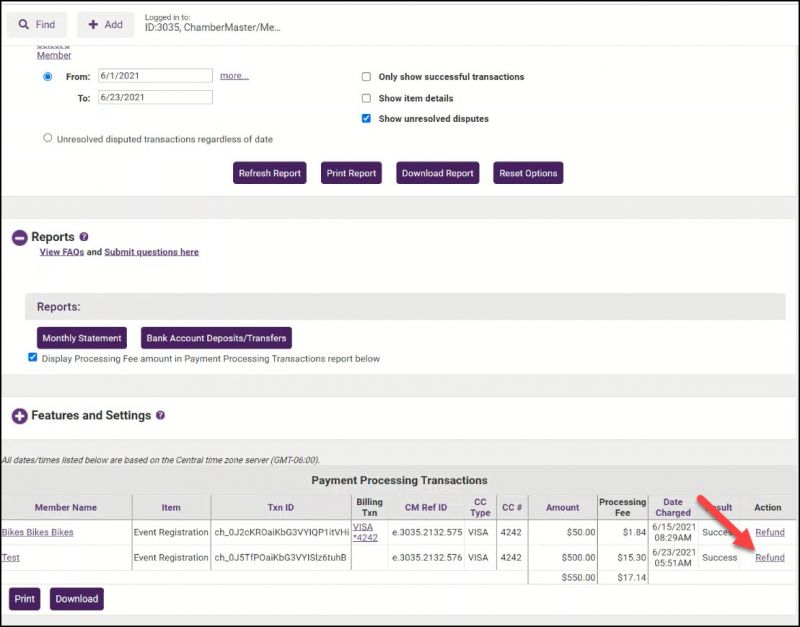
- In the Billing module, click the Reports tab.
- Click Payment Processing Reports / Management Tools in the Banking section.
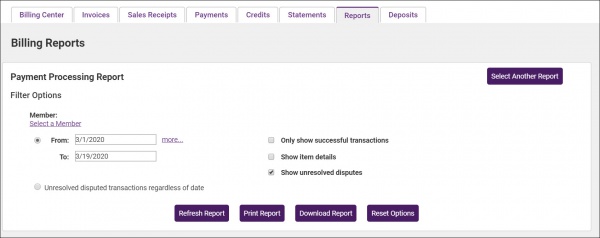
- Enter any desired filtering criteria, such as date range. You can also click the Select a Member link to search for transactions for a specific member.
- Click Refresh Report.
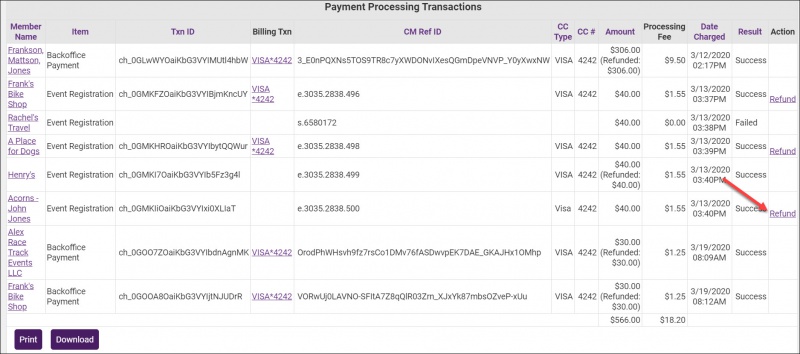
- In the Actions column, click Refund for the desired transaction. IMPORTANT: The Refund option will not be available if you have previously created a refund, the charge is over 90 days old, or the charge did not process successfully.
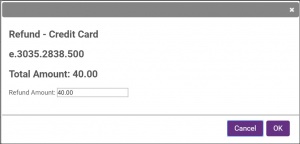
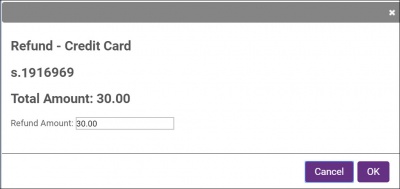
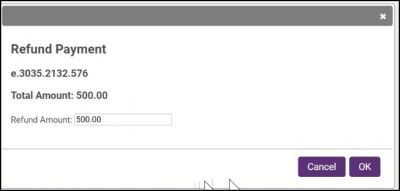
- The full amount of the payment is displayed to refund, you can enter a partial amount if needed.
- Click OK.
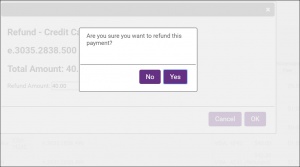
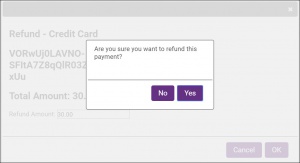
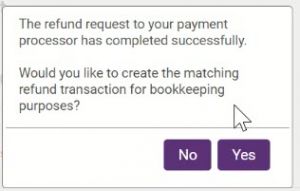
- Click Yes to confirm that you do wish to process this refund. Caution: once processed, the refund can NOT be reversed.
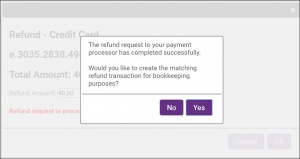
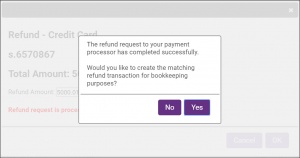
- If you would like to create the matching accounting transaction, click Yes. NOTE: If the option to create the matching transaction is NOT displayed, follow the instructions in Create a Refund for Cash/Check/Beanstream/PayPal to create the matching transaction.
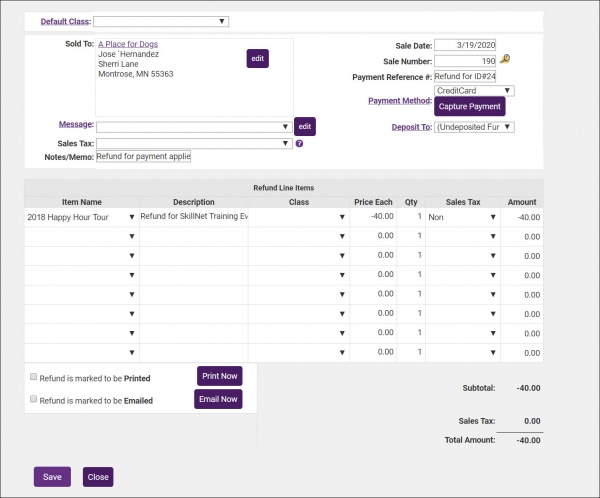
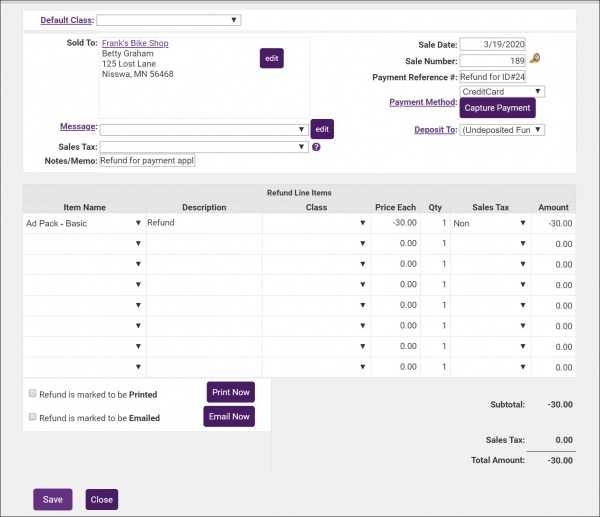
- The refund screen will display a negative amount for the refund. If you are processing a partial refund, change the amount in the Price Each column.
- Click Save.
The refund will display in the member's Transaction History as a Receipt.
| NOTE: With GrowthZone Pay a partial refund will appear on the person's statement a little differently than a full refund if the original charge has not yet fully processed. The credit won't appear as a separate line item on the bank statement. Instead, the original charge should post for a lower amount on the customer's statement. This will especially be an issue when a partial refund is issued shortly after the original charge was made. For example, a charge is made for $830.00. A partial refund is issued for $35.00 while the original charge was still listed as pending so the charge was updated to $795.00. There will not be a separate transaction for the refund issued. If the customer has questions on how this shows on their statement, they should contact their bank directly. |
Create a Refund for an Authorize.Net DPM Payment Made towards an Invoice
If you are using Authorize.net AIM Integration, you can process refunds directly back to Authorize.net from the back office. This is a two step process, first you will refund the credit card, then you will create the matching accounting transaction.
IMPORTANT: When creating refunds for Authorize.Net the following rules apply:
|
- Click Billing in the left-hand navigation panel.
- Click the Reports tab.
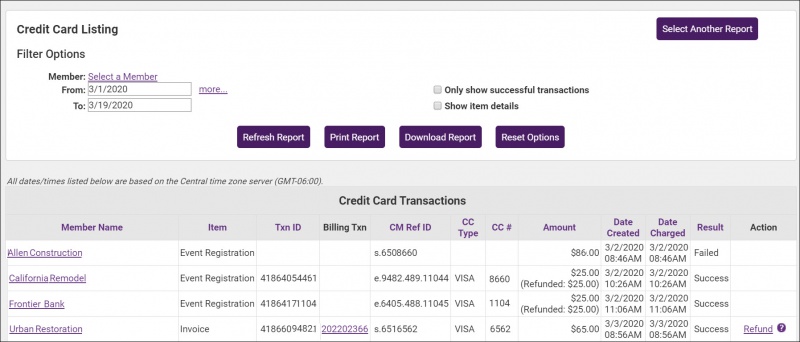
- Click Credit Card Listing in the Banking section.
- Locate the payment you wish to refund. You can click the Select Member link to choose a specific member, or you can enter a specific date range.
- For the desired payment, click the Refund link in the Actions column.
- NOTE: Unsettled may be displayed in the Action column instead of Refund. Unsettled indicates that this transaction is very new - typically less than 24 hours old. After about 24 hours, the credit card company will allow a refund to be processed.
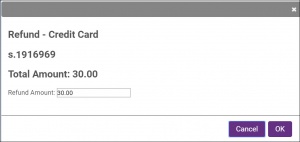
- Click OK to process the refund. NOTE: You may also update the Refund Amount if you wish to only process a partial refund.
- Click Yes to confirm you wish to process the refund.
- After the refund is process, click Yes to create the matching accounting transaction. NOTE: If the option to create the matching accounting transaction is NOT displayed, follow the steps described in Create a Refund for a Cash/Check/BeanStream-Bambora/PayPal Payment Made towards a Receipt to create the negative sales receipt.
- On the receipt screen, the line items that were paid with this credit card will be displayed. The total will be set to a negative value. If you are refunding the entire payment, click Save.If you are doing a partial refund, remove the negative sign from the items you are not refunding.
- Click Save.
The refund will display in the member's Transaction History as a Receipt.
Create a Refunds towards Receipts
Create a Refund for a Cash/Check/BeanStream-Bambora/PayPal Payment/External Processor Made towards a Receipt
- Click Billing in the left hand navigation panel.
- On the Billing Center tab, find the appropriate member.
- Click the Sales Receipt button.
- Select the same fee item used when creating the original sales receipt.
- In the Price Each column, enter a negative amount.
- Click Save.
- Click Close.
The refund will be displayed as a negative sales receipt in the list of transactions. You will now need to follow your business process for actually giving the money back to the contact.
Create a Refund for a GrowthZone Pay Payment Made towards a Receipt
- Select Billing in the left-hand navigation panel.
- Select the Reports tab.
- Click Payment Processing Reports / Management Tools in the Banking section.
- Filter the report to find the desired receipt.
- For the desired receipt, click the Refund link.
- On the Refund Payment screen click OK to refund the full payment. NOTE: You may also create a partial refund.
- Click Yes to confirm the refund.
- Once the refund is processed, to create the matching accounting transaction click Yes.
- Click Save to save the refund transaction.
- Click Close.
Create a Refund for an Authorize.Net DPM Payment Made towards a Receipt
IMPORTANT: When creating refunds for Authorize.Net the following rules apply:
|
- Click Billing in the left-hand navigation panel.
- Click the Reports tab.
- Click Credit Card Listing in the Banking section.
- Locate the payment you wish to refund. You can click the Select Member link to choose a specific member, or you can enter a specific date range.
- For the desired payment, click the Refund link in the Actions column. NOTE: Unsettled may be displayed in the Action column instead of Refund. Unsettled indicates that this transaction is very new - typically less than 24 hours old. After about 24 hours, the credit card company will allow a refund to be processed.
- Click OK to process the refund. NOTE: You may also update the Refund Amount if you wish to only process a partial refund.
- Click Yes to confirm you wish to process the refund through to the consumer.
The refund request has now been sent to Authorize.NET. To create the matching accounting transaction you will follow the steps described in Create a Refund for a Cash/Check/BeanStream-Bambora/PayPal Payment Made towards a Receipt to create the matching accounting transaction, but you do not need to process the refund through the Auhtorize.NET system, as this has been accomplished.
