Administrator Tasks
Contents
- 1 Getting Started
- 2 Configuring Basics
- 3 Customizing the Software
- 3.1 Membership Types
- 3.2 Member Login Area Options & Settings
- 3.3 Enable and Customize Promote Your Business Widget in MIC
- 3.3.1 Enable/Disable the Promote your Business and the Upgrade Your Listing Widget
- 3.3.2 Edit the Message on Promote Your Business and the Upgrade Your Listing Widget
- 3.3.3 Determine the Email Recipients of Promote Your Business and the Upgrade Your Listing Widget
- 3.3.4 Customize Forgot Password Error Message
- 3.4 Customize the Member Information Center MIC Help
- 3.5 Customize the Member Information Center MIC4 Search
- 3.6 Customize the Member Information Center Features Available
- 3.7 Social Network Publishing
- 3.8 Customizable Menu selections
- 3.9 Customize the Website Modules
- 3.10 Credit Card Processing
- 3.11 Internet Fax Service
- 3.12 Miscellaneous Settings
- 4 Help Documentation
Getting Started
When your GrowthZone/ChamberMaster software if first installed, one or more users will be designated as Administrator. These individuals should ensure that your database is configured with some basic settings. As you continue using your software, you may desire to customize many different settings such as Custom Fields, Online Event Calendar preferences, and Member Information Center options.
If you are just getting started with Admin Tasks, watch this 32 minute overview video ![]()
Configuring Basics
The GrowthZone support team works with your association as your data is converted and imported. Many items will already be customized to you. However, having a comfort level with viewing these selections and knowing where to change them if needed may be desired.
Four areas are commonly referenced in the first weeks of using your software:
- Business Information (association name & address etc)
- General Options (integration settings)
- Employees/Reps (staff login names and passwords)
- Business Categories (member online directory categories)
Set Up Organization Information
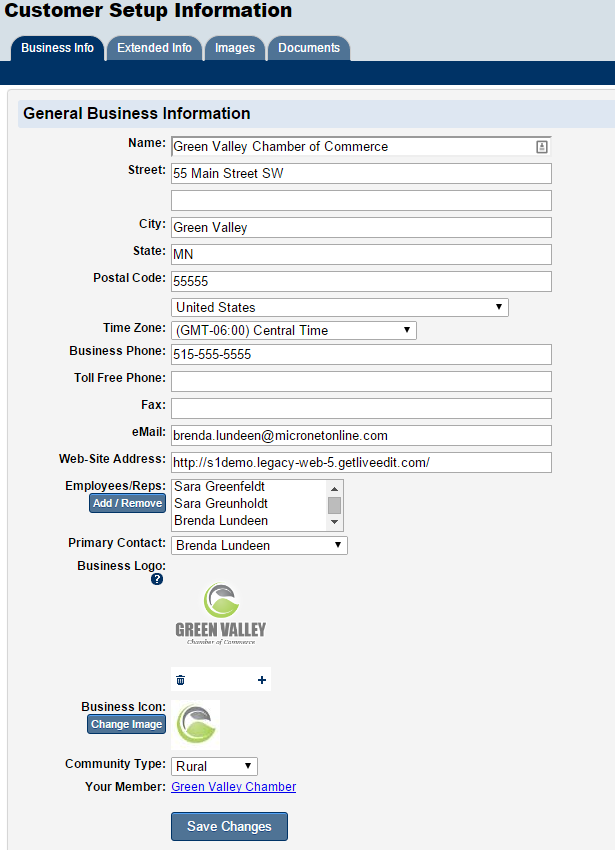
Information in these fields will be the default business information displayed within your software and on certain integrated web pages.
- Click Setup in the left-hand navigation bar.
- Click Association Information in the Association Options area.
- Edit the desired fields on the General Association Information screen.
- Ensure your association's name and address is complete and accurate.
- Select the correct country and time zone.
- Update your phone numbers and website.
- Enter in your association's generic email address.
- This email is used when automatic emails are sent from the database as the from address
- Upload your association's logo for display at various places through the software.
- See Upload Your Logo for details
- Click Save.
General Options & Settings
1. |
Click Setup in the left-hand navigation bar. |
2. |
Click General Options & Settings in the Association Information area. |
3. |
Edit the desired fields in the General Options & Settings screen. |
General Settings -> Auto-update representative contact information when updating members*: This will default to on for new associations. Existing associations will have to check to select this option so that individual representative information (Reps tab) will automatically update when matching member information (General tab) is updated. |
General Settings -> Send automatic email notification to member when their submission for deals/jobs/events/news etc is approved: Defaulted to on. Members will receive an automatic email when staff sets their submission to Approved. No notice is sent if a submission is disabled or deleted. The email is sent to the following email address based on this criteria: |
General Settings -> Default Member Status: when new members are created by clicking the Add button on the toolbar, the Status drop-down will have the default status selected here. Choices are: Active, Courtesy, Non-Member, Prospective, or Dropped. |
General Settings -> Newsletter Solution: If you have a subscription to Constant Contact, select Constant Contact. This will display Constant Contact menu choices within GrowthZone/ChamberMaster. Note: Also complete the Constant Contact section in the Add-On Manager area below. |
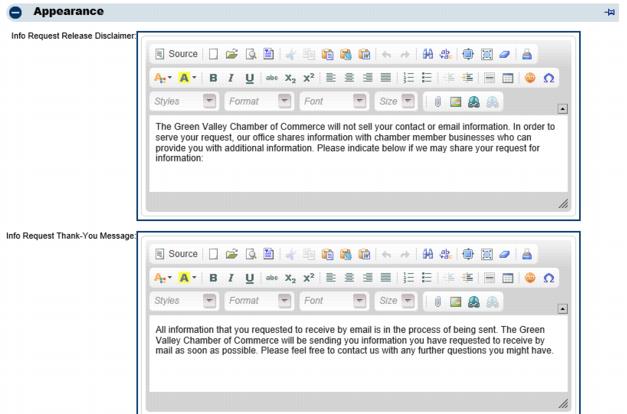
Appearance -> Info Request Release Disclaimer and Thank you Message. Customize the text that appears on the public website when in the Info Request module. |
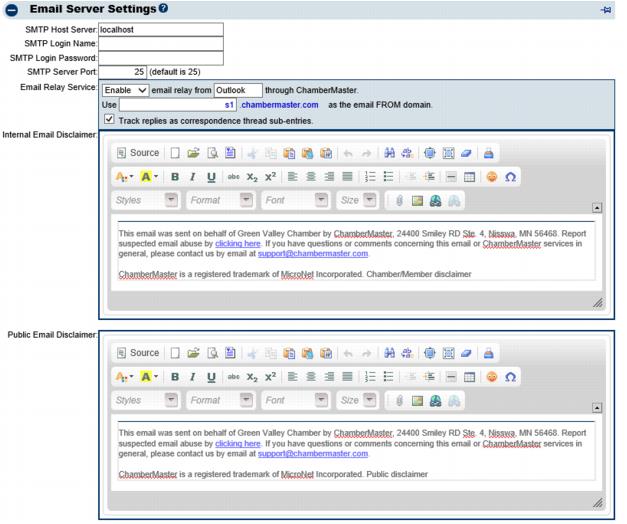
Email Server Settings -> Internal Email Disclaimer: appear on emails sent from inside the database, typically emails sent from you to your members. Disclaimers do not appear on the bottom of emails sent using the “Send with Outlook” selection. |
Email Server Settings -> Public Email Disclaimer: appear on emails that are generated by visitors that access your public website and click links that send emails to you or your members. For instance the “Request Info” link found on the members’ public information page. |
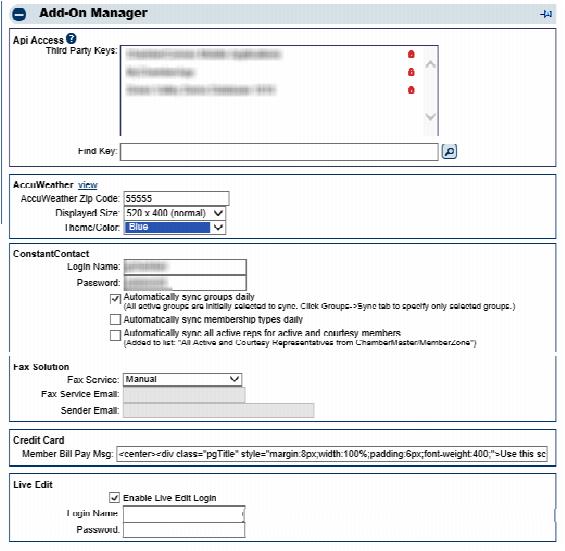
Add-on Manager -> Constant Contact: If you have a subscription to Constant Contact, record your subscription login and password here. Having the login credentials recorded here will allow automatic opening to your Constant Contact account from certain menu selections in GrowthZone/ChamberMaster. For example: Communication->Newsletters/Email Campaigns. To also allow GrowthZone/ChamberMaster to automatically update your Constant Contact lists, select one or both of the synch checkboxes. See “Enable Constant Contact Synchronization” for more information. |
Add-on Manager -> Fax Solution: If you have a subscription to an Internet Fax Service, select that here and record the appropriate email addresses. See” Internet Fax Service” for more information. |
Add-on Manager -> LiveEdit: If you are using LiveEdit as your Content Management System, record your login credentials here. This will place a shortcut button on your toolbar to allow quick access to edit your website. See “Enable LiveEdit button” for more information. |
An Application Programming Interface (API) is now available to 3rd party developers that wish to create their own applications from your database. If you have someone wanting to develop a special-use application for you, contact support@micronetonline.com to receive a unique API key for your developer and the API documentation. Access is only granted to a 3rd party developer with your express permission. |
4. |
Click Save. |
Staff/Employee Logins and Permissions
Our support team will provide your initial login name and password for a single staff person. Additional login names and passwords may be created at your convenience under Setup > Employees/Reps. Default address, phone number and email address information for each staff person are modified here as well.
You will assign a certain level of permission to your staff based on their need for access to financial information, administration tools and basic member information.
Receiving the highest permission level of Administrator gives the ability to modify any of the settings in your software – including the ability to add/remove other staff logins and assign different permission levels.
Staff Permission Levels
- Administrator: Staff/employee with all available rights in the software; full access to all financial and setup areas; able to add new database fields within the software screens
- Finance: Staff/employee with all rights except ability to modify Setup selections
- Standard User: Staff/employee with all rights except ability to modify Setup selections and access the QuickBooks or Billing menu.
- Standard User permissions still allow the ability to view invoice and payment activity on the members’ account.
- Disabled: Staff/employee with this permission level will not be able to login to the software.
Add New Staff Access
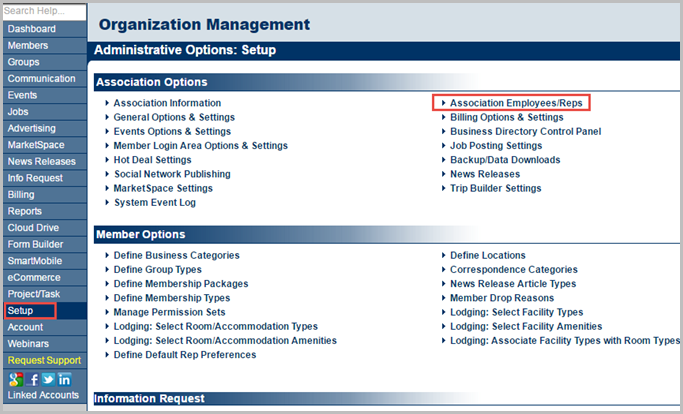
1. Click Setup in the left-hand navigation bar.
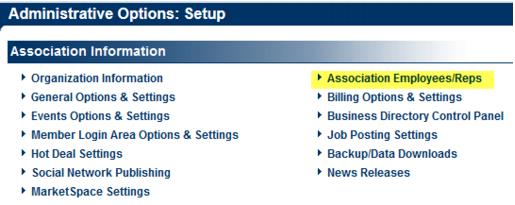
2. Click Association Employees/Reps in the Association Options area.
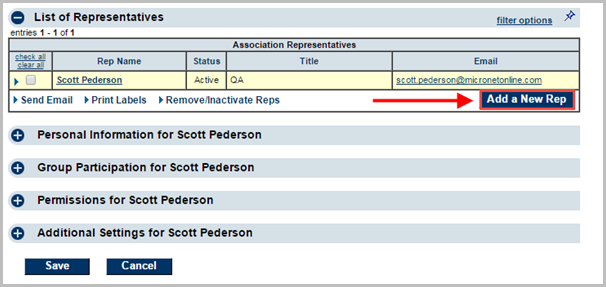
3. Click Add a New Rep.
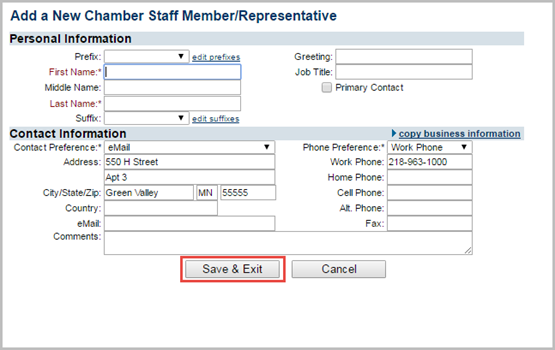
4. Complete the Personal Information and Contact Information sections.
- Note: The Email Address recorded here should be the same email address that is used when accessing your own email program. If correctly specified, then using the options in software to "Email from Outlook" will not give an error. See Email Sending Options for more information.
- Note: The First Name and Last Name fields (with a space between the 2 fields) will be what displays in the “From” line in the recipient’s email inbox.
5. Click Save & Exit.
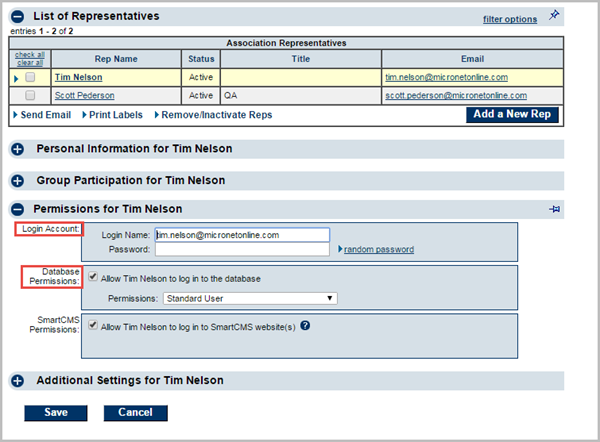
6. To create a login account for this staff user, click their name in the List of Representatives, expand the Permissions for... section and click Create Login Account.
7. Complete the Login Account and Database Permissions sections and click Save.
Note for Users of SmartCMS: A staff user's permission for SmartCMS are also configured in this section.
Note: To edit a staff user's email notifications, expand the Additional Settings For... section and select the desired options.
Set Email Notifications
1. Click Setup in the left-hand navigation bar.
2. Click Association Employees/Reps in the Association Options area.
3. Click Add a New Rep.
4. Complete the Personal Information and Contact Information sections.
- Note: The Email Address recorded here should be the same email address that is used when accessing your own email program. If correctly specified, then using the options in software to "Email from Outlook" will not give an error. See Email Sending Options for more information.
- Note: The First Name and Last Name fields (with a space between the 2 fields) will be what displays in the “From” line in the recipient’s email inbox.
5. Click Save & Exit.
6. To create a login account for this staff user, click their name in the List of Representatives, expand the Permissions for... section and click Create Login Account.
7. Complete the Login Account and Database Permissions sections and click Save.
Note for Users of SmartCMS: A staff user's permission for SmartCMS are also configured in this section.
Note: To edit a staff user's email notifications, expand the Additional Settings For... section and select the desired options.
Modify Login Access
1. |
Click Setup in the left-hand navigation bar. |
2. |
Click Employees/Reps in the Association Information area. |
3. |
Click the desired rep’s name in the List of Representatives area. The selected row will show in yellow. |
4. |
Edit the Login Name, Login Password and Permission Level fields in the Permissions area as desired. |
5. |
Click Save. |
Business Categories
Modify Business Directory Categories
Printing Business Category Reports
QuickLinks
Point of Interest Categories
MarketSpace Categories
Customizing the Software
Many options are provided for customizing the selections which allow the software to perform and look the way you want.
- Membership Types may be created so you can assign Membership Types of your own through a drop-down list when creating or modifying your member’s record. Selecting your members by Membership Type then is an option that is available throughout the software.
- Menu choices in the Members Only login area may be customized providing the precise experience that you desire for your membership.
- The “look and feel” of other public website modules may also be customized using menu selections in “Event Options and Settings” or “Business Directory Control Panel”. Settings specific to Hot Deals, job postings, and MarketSpace may also be modified.
- Social Networking options are available to allow Job Postings, Events, Hot Deals, New Members, and News Releases to be promoted on your Facebook, Twitter, or LinkedIn account with only a few one-time selections. This feature is only available to associations that have upgraded to the Plus edition or greater.
- Plus edition users or greater may also include credit card as a payment method for event registration, online membership application payment, or when member pay bills online in their Member Information Center.
Note that only staff with Administrator Level permissions are able to make these changes.
Membership Types
Membership Types may be created so you can assign them to a drop-down list when creating or modifying your member’s record. Selecting your members by Membership Type then is an option that is available throughout the software.
Define Your Own Membership Types
1. |
Click Setup in the left-hand menu. |
2. |
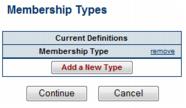
Click Define Membership Types. |
3. |
Click Add New Type. |
4. |
Type the desired Membership Type. |
5. |
Click Save. |
6. |
Continue adding new types and then click Continue when desired Membership Types have been created. |
Assign Membership Type to a Member
1. |
Click Members in the left-hand menu. |
2. |
Select the desired member from the drop-down menu. |
3. |
On the General tab, click the Membership Type arrow in the Additional Information area to select the desired Membership Type. |
4. |
Click Save. |
How are Membership Types used?
• |
Reports may be viewed/generated by Membership Type |
• |
Communication may be sent/created by Membership Type |
• |
Event invitations may be sent by Membership Type |
Member Login Area Options & Settings
Customize the Member Login area selections
1. |
Click Setup in the left-hand menu. |
2. |
Click Member Login Area Options & Settings in the General Information area. |
3. |
Click the Permissions tab. |
4. |
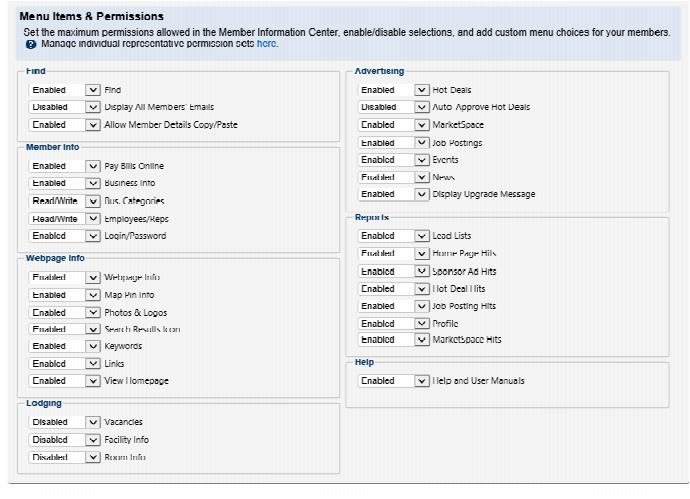
Select Enable for selections that should appear on the Members’ menu, and select Disabled for selections that should not appear. |
5. |
Click Save. |
Control members access to other member email addresses
1. |
Click Setup in the left-hand menu. |
2. |
Click Member Login Area Options & Settings in the General Information area. |
3. |
Click the Settings tab. |
4. |
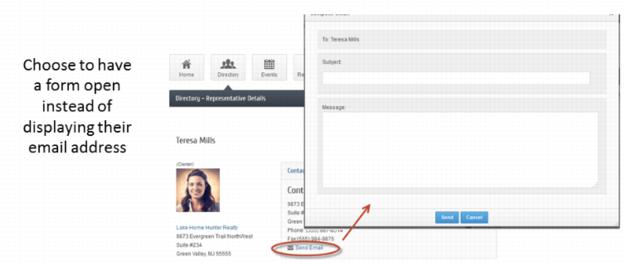
In the Email Addresses area, select how you’d like the email addresses to appear for member and reps in the Member Information Center. (v or greater) |
5. |
Click Save. |
1. Click Setup in the left-hand menu.
2. Click Member Login Area Options & Settings in the General Information area.
3. Click the Menu Items tab.
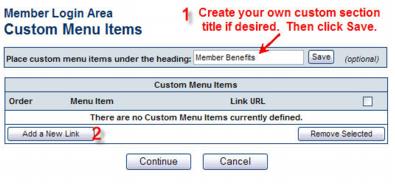
4. Click Add/Edit Menu Section 1 (or Add/Edit Menu Section 2 or Add/Edit Menu Section 3). Each section represents a separate section of the menu displayed in the Member Information Center.
- Figure: Creating Custom Links
5. Create your own custom section title if desired and then click Save.
6. Click Add a New Link.
- Figure: Adding a Custom Menu Item
7. Complete the Add Custom Menu Item fields.
8. Click Save.
9. Click Continue.
Modify the Member Login area Home page text
1. Click Setup in the left-hand menu.
2. Click Member Login Area Options & Settings in the General Information area.
3. Click the Messages tab.
4. Click edit.
Figure 2-11 Home Page Appearance
5. Click Use Custom.
6. Click Edit.
7. Make desired changes to the text.
8. Click Continue.
9. Click Save.
Note: You can return to the default text at any time by clicking Use Default and then click Save.
Enable and Customize Promote Your Business Widget in MIC
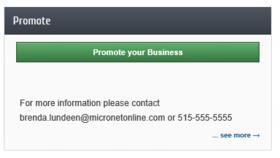
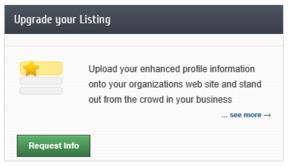
The Promote Your Business widget will display in Member Information Center (MIC) for those that have a Basic Web Participation package to encourage Basic package members to upgrade to an Enhanced Web Participation package. You can enable/disable the widget and control the message that appears with the widget.
MIC Version 4: Promote Your Business and Upgrade Your Listing widgets appear on the Company Information->Profile Summary page.
The Upgrade your Listing widget may also appear and be controlled by this setting depending your benefit campaign arrangement with GrowthZone (if any).
Enable/Disable the Promote your Business and the Upgrade Your Listing Widget
1. Click Setup in the left-hand menu.
2. Click Member Login Area Options & Settings in the General Information area.
3. Click the Permissions tab.
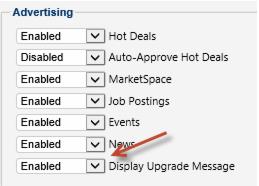
4. Click the Enabled/Disabled selection in the Display Upgrade Message drop down.
5. Click Save.
Edit the Message on Promote Your Business and the Upgrade Your Listing Widget
1. Click Setup in the left-hand menu.
2. Click Member Login Area Options & Settings in the General Information area.
3. Click the Messages tab.
4. Click Use Custom.
5. Click Edit.
6. Make desired changes to the text.
7. Click Continue.
8. Click Save.
Note: you can return to the default text at any time by clicking Use Default and then click Save.
Determine the Email Recipients of Promote Your Business and the Upgrade Your Listing Widget
1.Click Setup in the left-hand menu.
2. Click Member Login Area Options & Settings in the General Information area.
3. Click the Messages tab.
4. Type the email addresses of the desired recipients of those that submit a request to "promote their business.”
5. Click Save.
Note: you can enter multiple email addresses separated with a semi-colon.
Customize Forgot Password Error Message
1. |
Click Setup in the left-hand menu. |
2. |
Click Member Login Area Options & Settings in the General Information area. |
3. |
Click the Messages tab. |
4. |
Click Use Custom. |
5. |
Click Edit. |
6. |
Make desired changes to the text. |
7. |
Click Continue. |
8. |
Click Save. |
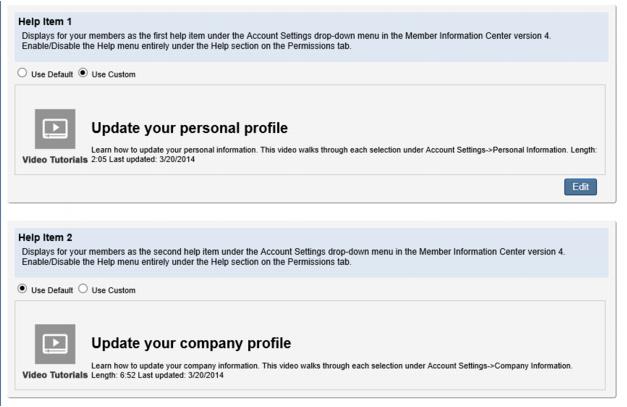
Customize the Member Information Center MIC Help
1. |
Click Setup in the left-hand menu. |
2. |
Click Member Login Area Options & Settings in the General Information area. |
3. |
Click the MIC Help tab. |
4. |
Click Use Custom on either Help Item 1 or Help Item 2. |
5. |
Click Edit. |
6. |
Make desired changes to the text. |
7. |
Click Continue. |
8. |
Click Save. |
Customize the Member Information Center MIC4 Search
Member Information Center version 4 has powerful search ability in the member directory. Customize what options and filters display and whether include reps in addition to the members in the search results.
Customize MIC Version 4 Search Results
1. Click Setup in the left-hand menu.
2. Click Member Login Area Options & Settings in the General Information area.
3. Click the Settings tab.
4. Select the desired filters and search result options.
5. Click Save.
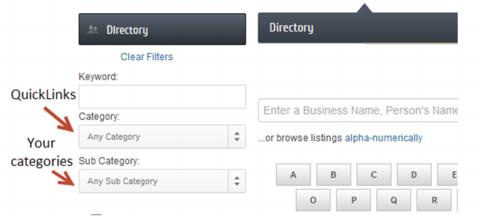
- Enabling your QuickLinks in the MIC search will display in the MIC as Categories. Then your Categories will be labeled as Subcategories, making it easier for members to understand the hierarchy.
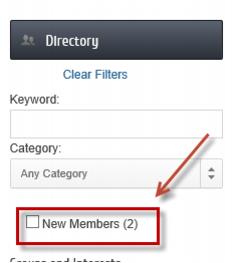
- New Members filter displays a checkbox where those searching would see those with a Join Date of today or 30 days prior.
- Selecting Yes for Display Representatives in Search Results will display only members in your MIC Directory instead of both members and rep names. If set to No, Rep names and information may still be viewed when accessing the member details page but now the rep names and member names don't have to mingle in the directory.
Customize the Member Information Center Features Available
1. Click Setup in the left-hand menu.
2. Click Member Login Area Options & Settings in the General Information area.
3. Click the Settings tab.
4. Select the desired additional features or enable/disable the Community Activity Feed.
5. Click Save.
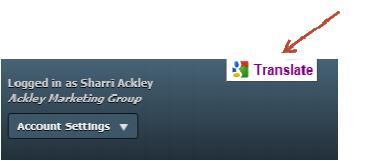
- Google Translate makes it possible displays the Member Information Center in the language selected by the viewer. Enabling this selection displays the Translate button on-screen.
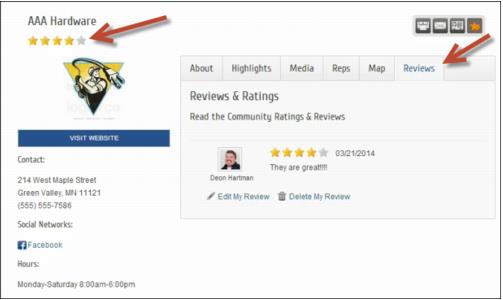
- Member to Member Reviews enables ability for members to rate and reviews each other if desired. Note: No automatic staff notifications when reviews are posted at this time.
- Allow members to login with their social login. If disabled, this removes the social login option from your /login page.
- Request for Proposal Module turns on/off the Request for Proposal menu selection from display in the Member Information Center.
Social Network Publishing
Connect to Twitter / Facebook / LinkedIn
1. |
Click Setup in the left-hand menu. |
2. |
Click Social Network Publishing. |
3. |
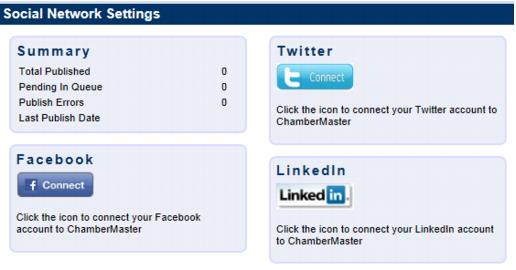
Click the Twitter Connect/Facebook Connect/LinkedIn icon to connect your Twitter/Facebook/LinkedIn account to ChamberMaster. |
4. |
Follow the on-screen prompts. |
5. |
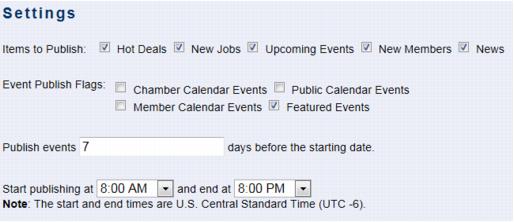
In the Settings area, click the checkmarks to select the desired items to publish. |
6. |
Select which calendar(s) should be published. |
7. |
Type the number of days that events should be published before the starting date of the event. |
8. |
For LinkedIn users: After connecting to LinkedIn, select one of your groups in the Additional LinkedIn Options section to indicate to the discussion group where posting will occur. Note: You must be the owner (creator) of the LinkedIn group in order to post to that group; group membership is not enough. This group must be selected prior to clicking “Post Test Message”. |
9. |
Click Save. |
10. |
Click Post Test Message to initiate a check of the connection and to verify where the post will display. |
Disconnect Twitter from GrowthZone/ChamberMaster
If connected to the wrong Twitter account by mistake, or in certain troubleshooting situations, you may wish to disconnect Twitter from the ChamberMaster connection.
1. Login to your Twitter account that you wish to have disconnected.
2. Click Profile.
3. Click Edit your Profile.
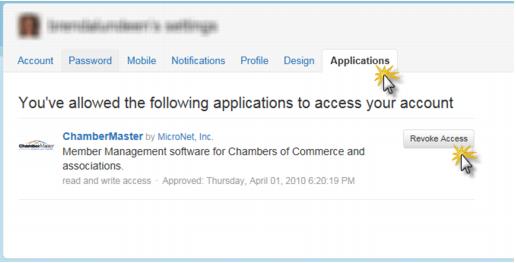
4. Click Applications.
5. Click ChamberMaster.
6. Click Revoke Access.
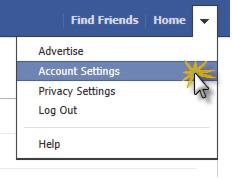
Disconnect Facebook from GrowthZone/ChamberMaster
1. |
Login to the Facebook account you wish to disconnect. |
2. |
Click the menu arrow in the upper right-hand corner. |
3. |
Click Account Settings. |
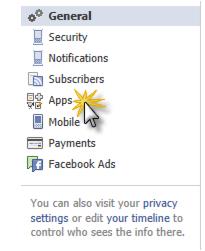
4. |
Click Apps. |
5. |
Find ChamberMaster on the list. |
6. |
Click the x at the end of the ChamberMaster entry. |
7. |
Click Remove. |
8. |
Click Okay. |
Disconnect LinkedIn from GrowthZone/ChamberMaster
Repost Single Event to Your Facebook page
Customizable Menu selections
Customize the Website Modules
Modify Event Options and Settings
Modify Business Directory Control Panel
Modify Job Posting Settings
Modify Hot Deals Settings
Modify MarketSpace Settings
Credit Card Processing
Internet Fax Service
What is an email fax service?
Configure GrowthZone/ChamberMaster to use my email fax service
Which email fax services are supported?
Miscellaneous Settings
Enable LiveEdit Button
Enable Constant Contact Synchronization
Upload your logo
Enable Votility Integration
Help Documentation
Browse the Admin Tasks Table of Contents
